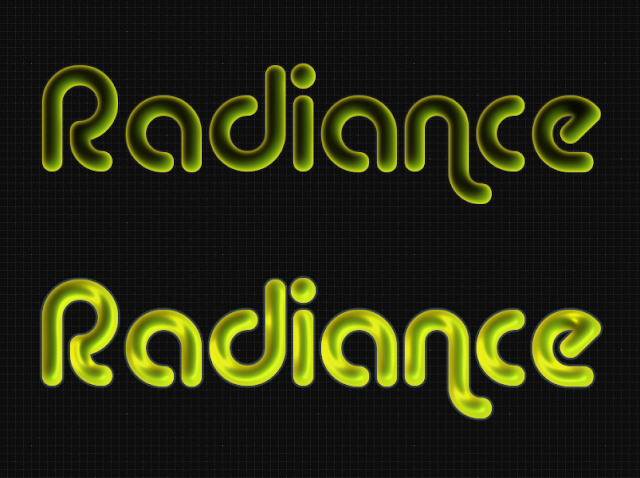
This effect explores the idea of layering inner glows on top of each other and how we can get even more results with G'MIC filtering.
01. Start with a dark grey canvas
800x300px
02. Type your text in a rounded font – Alba is a good choice, but you can only use it for personal projects without buying a license. If you are using Alba, make it 186px.
Fontsquirrel is another site that has plenty of rounded fonts to choose from.
Fontsquirrel is another site that has plenty of rounded fonts to choose from.
Alpha select your basetext and save it
to a channel for future use.
03. Now lets make glows.
I start with a very sunny yellow
#ffea18
Fill the inverted selection with that
colour.
For the second glow i used a somewhat
dark green #5a5513.
For the third glow i picked a colour
that is inbetween: a juicy green: #83c213
04. With all the colours set, we need
to apply the Gaussian Blur
I used 10 for the yellow, 40 for the
dark green and 20 for the juicy green inbetween.
You can always turn on the saved
channel and turn up the opacity to 100% so that it acts like a mask to see what it will look
like.
I wanted the yellow at the edges
stronger, so i duplicated the layer and reduced the opacity of the
duplicate to 60%.
The dark and juicy green layers will be
Inner Shadows, so we need to apply the offset:
-7/-7 for the juicy green and -7/-3
for the dark green (in the Offset dialog (Ctrl + Shift + O)).
I also reduced the Opacity of the dark green to 60%, but that will all depend on your individual colours and taste.
I also reduced the Opacity of the dark green to 60%, but that will all depend on your individual colours and taste.
When you are ready, apply to all Glow and Inner Shadow layers, layermask from channel.
05. Next we will add an Outer Glow to
mask jaggy edges.
Create a new layer under your basetext
and fill the basetext-selection with a whitish colour.
I used #f3ffde.
Then blur it – i used 4px because bigger values will make the whole text appear fuzzy, but that might what you want.
Then blur it – i used 4px because bigger values will make the whole text appear fuzzy, but that might what you want.
I reduced the Opacity to 60% and the
Mode to 'Screen' because i wanted something very subtle that you can barely see.
06. Of course the glow effect works
best with a dark BG, you could change it to simple black or use a
pattern/texture of your choice.
I used the subtle pattern 'inflicted'
and darkened it with a black layer on top with the Mode set to 'Soft
Light' at 72%.
You can find the subtle patterns website here:
http://subtlepatterns.com/
and the Gimp pat-files here:
https://github.com/dbb/subtle-patterns-gimp
You can find the subtle patterns website here:
http://subtlepatterns.com/
and the Gimp pat-files here:
https://github.com/dbb/subtle-patterns-gimp
This would be our basic glow
text-effect – simple but effective.
But we can do more than that !
07. Turn off all the background layers,
plus the Outer Glow.
Now rightclick on your top layer and
select 'New from Visible', then turn all the layers on again.
Next go to G'MIC → Lights &
Shadow → Relief Light.
Begin with the slider at the bottom: 'Image Smoothness' and tweak it, until you get a wet shiny look.
I used the value 0.3.
Turn up 'Specular Size' to the max,
then play with the other sliders, until you get a nice shiny, wet
looking text with good contrast.
Set Output Mode to 'New layer', then
hit apply.
Apply a layermask from channel to your
Relief Light layer and turn off the 'New from Visible' layer (or
delete it).
Set the mode to 'Value' and maybe
reduce the Opacity to 80% and you will get this illuminated jelly
effect.
You can tweak that result with a curve to get better contrast, like this.
And this concludes this tutorial, hope
you find it useful.


1 comment:
this effect is definitely one fo my favourites from the gimp science labs! the tronic layering effect too, really great looking stuff :). i've finally got something from this tutorial and i'm off to gimp chat right now to share my result.
Post a Comment