This tutorial is based on a video that the mighty xgeous posted over at gimpchat.com.
(see this thread for more details: http://www.gimpchat.com/viewtopic.php?f=4&t=6607)
Xgeous also has a youtube channel, which you can check out here:
http://www.youtube.com/user/xgeous
I modified his technique a bit and will show you a variation at the end, on how to get a different gloss.
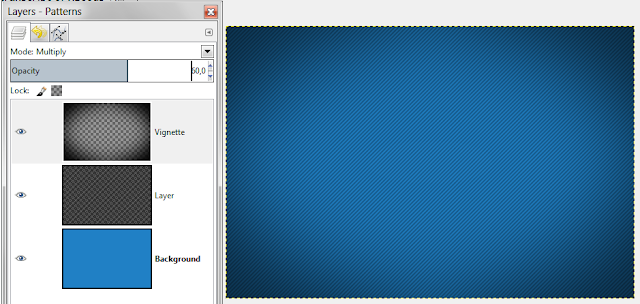
01. Create a new file 600 x400px #2080c5 as your background
02. create a new transparent layer on top of your BG but make it 1000x1000px
fill this layer with a Grid (Filters - Render - Pattern - Grid)
04. rotate the layer by 45°,
05. then move it so it overlaps your BG perfectly
'Layer to image size' and turn down Opacity to about 30%
06. for a Vignette Effect, create a new transparent layer
make an elliptical selection, invert and fill with black
07. blur by 200px
change mode to 'Multiply' and turn down Opacity to 60%
08. type your text in a 50ies grey (#808080) - i used the font 'Valken Thin' 156px
center with the 'Align Tool'
'Layer to imagesize'
09. alpha select the text and save it to a channel
10. for a bumpmap duplicate the saved channel
Gaussian Blur the channel by 3px
(the mask is green because i changed the color for this tutorial so you guys can better see it)
11. activate the grey text and apply a bumpmap with the blurred channel as the map:
12. apply 'Color to alpha' with the 50ies grey so that you are only left with the white highlights
13. on a new transparent layer stroke selection by 6px with black
then Deselect
blur the stroke by 20px
14. alpha select text again
Invert
cut blurred stroke and we have an Inner Shadow
15. invert selection again
apply Dropshadow with default values but lower Opacity to 88%
16. select from saved channel
save selection to a path
stroke path by px with black on a new transparent layer
change the Mode to 'Grain Merge' and reduce the Opacity to 15%
17. create new transparent layer on top of text layer
fill selection with pattern (i used the 'Leather' pattern that comes with Gimp)
add white layermask
18. stroke on the layermask a gradient from black to white, to make the pattern partly translucent.
Put the pattern-filled layer under the stroke layer.
This is your glossy acrylic texteffect based on xgeous' technique and here is a screenshot of all the layers:
Now i will show you the Esper technique of how to modify the gloss.
19. apply an alpha-curve to the highlight like this:20. then duplicate this layer twice and move your three linked gloss layers 1px down and 1 px to the right
your result will look like this:
For yet another variation we will delete the pattern-filled layer and duplicate the Grid-filled layer.
On Grid-filled layer one, we apply a layermask 'Channel' and 'Invert Mask'.
This will make the grid inside the text invisible.
On the second Grid-filled layer on top of the first, we will apply a layermask 'Channel', so everything outside the text is invisible.
Next we duplicate our saved channel and blur it by 20px.
Activate the upper Grid-filled layer (with the grid inside the text) and apply 'Displace' on it, with the blurred 20 channel as the map.
I used a value of 100px.
That effect will look like this:


No comments:
Post a Comment